 Updated: November 26 2012 (does not work with iOS6!)
See updates at the end.
Running 1985 Code on a 2010 Device
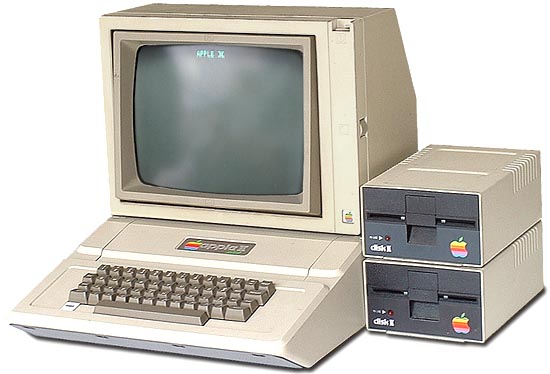
I had an awesome childhood; a big part of that was computers, specifically my Apple II+. Ah, the memories…
Sadly I do not have my original Apple II+ (clone). Nor do I recall the name of the manufacture. C’est la vie.
Well now I can relive all my “memories” on my iPhone and iPad. But it’s going to take a bit of work, and I am going to need some stuff:
- My “memories”, i.e. my original Apple II+ floppies from high school.
- An Apple II computer with floppy drive and a serial port.
- A null-modem serial cable to connect my Apple II to my Mac.
- ADTpro Apple II to Mac transfer software.
- ActiveGS – Best Of FTA iOS app from the App Store. This is an Apple IIgs emulator capable of running most Apple II, II+, IIe, and IIgs warez.
- A text editor to edit the list of images in ActiveGS.
- Something to create ActiveGS icons. (optional)
- iExplorer, to get my stuff into ActiveGS.
 Memories
After a bit of digging I found my very first floppy disk. I should probably have it framed, like others do with their first dollar. Hopefully it still works.
Hardware
This is the hard (pun intended) part. You are going to need a real Apple II or know someone that has one. Your best bet is an Apple //c. They are self-contained (floppy drive and serial port) and are easy to find. As I write this there are many on eBay and at least one listed in the local classifieds. To connect your Apple //c to your computer (MacBook Air in my case) you are going to need a serial cable and a USB to serial adapter. I opted to purchased my cable (call me lazy) from http://retrofloppy.com/products.html#DIN5DE9. I had an existing USB to serial adapter from Keyspan that works just fine.
Liberating Your Warez
ADTpro (http://adtpro.sourceforge.net/) is a very well maintained Apple II floppy disk to floppy image (and v.v.) utility and is very easy to use. Just follow the instructions from their site and in a few minutes you will have liberated your first floppy disk. (It is very cool to see ADTpro boot your Apple //c from the serial port.)
ActiveGS
ActiveGS is an Apple IIgs emulator and is available for most platforms as a standalone app and as a browser plug-in. Recently (Feb 24th) an iOS ActiveGS app was published and is available via the App Store. However, I do not think it will last very long…
iDOS (based on DOSBox) is very similar to ActiveGS, but for DOS programs. After a rocky start iDOS finally made it to the App Store just to be removed because users could add their own binary content to iDOS. That was the point of iDOS to begin with. To get back online iDOS had to come with preloaded apps and remove the ability to add content via iTunes File Sharing. But it didn’t take long for users to figure out that by using iExplorer content could be added. This same “trick” needs to utilized to add content to ActiveGS. In time, this will be the undoing of ActiveGS.
Inserting content to ActiveGS
Download, install, and launch iExplorer (NOTE: If you have problems with iExplorer, then use DiskAid). Connect up your iOS device and then find the Best of FTA/Documents directory. This is where you will place all your disk images as well as any thumbnails and/or screen shots. Note: Do not place your images, thumbnails, or screen shots in the Best of FTA/Best of FTA.app directory, unless you want them read-only and lost on iPad/iPhone restore.

To add a disk image, just drag-and-drop an Apple II or IIgs disk image into that directory along with any thumbnails and screen shots (NOTE: iExplorer will only drop a single file, IOW, do not multi-select; drag one at a time). Next, you will need to define your image to ActiveGS. This needs to be done in the Best of FTA/Best of FTA.app directory.

Copy the list.activesxml file to your computer, then open it up with your favorite text editor and add a section for your image, e.g.:
<config version="2" id="my0a">
        <name>High School Classics</name>
        <year>1984</year>
        <publisher>Me</publisher>
        <desc><![CDATA[
        Midlife Crisis Classics!
        ]]></desc>
        <pic type="thumbnail" width="64" height="40">../Documents/dos33-0.png</pic>
        <format>APPLE2</format>
        <image slot="6" disk="1">../Documents/my0a.dsk</image>
        <pic type="screenshot" width="320" height="240">../Documents/dos33-1.png</pic>
        <bootslot>6</bootslot>
</config>
It should be obvious where to place your new config section. Review the file for other examples. After you have made your changes drag lists.activesxml back to your iOS device. You should also create a 64×40 pixel image for the icon and drag that there too. You’re done!
You will need to kill (double click the home button, find ActiveGS, and press the minus (-) sign) and restart ActiveGS on your iOS device for the changes to take effect. Hopefully your new start-up screen will look something like this:

ActiveGS iPad Usability Tips
- Swipe down to reveal the ActiveGS menu bar. The menu bar has a button to return back to the main menu on the left side, and a button on the right for various emulator options.
- Swipe up to reveal the keyboard. Swipe up a 2nd time to get a 2 button gamepad.
- Pinch to zoom the screen, however you cannot place the screen.
- You can use a Bluetooth keyboard. However none of the modifier keys (including control) are mapped. This is a limitation of the Apple iOS SDK. To use the BT keyboard ActiveGS must be in keyboard mode (swipe up until you have just a row of modifier keys on the bottom).

iPad 2 + BT Keyboard + ActiveGS = Apple IIcgs
- The virtual joystick is difficult to use, practice, practice, practice…
Enjoy!
Credits
- Apple II+ Picture. oldcomputers.net
Update: March 2 2011, Multi-disk sets
I actually had two high school diskettes that I labeled I and II (I is in the photo above). Yielding a small pair of scissors, I cut a notch in both diskettes so that I could use the flip side (this was common practice in the ’80s to double your capacity). 27 years later, I’ve now imaged all 4 sides. Do I really need 4 different menu items? No. Just add multiple duplicate entries for each disk in your config, e.g.:
        <image slot="6" disk="1">../Documents/my0a.dsk</image>
        <image slot="6" disk="1">../Documents/my0b.dsk</image>
        <image slot="6" disk="1">../Documents/my1a.dsk</image>
        <image slot="6" disk="1">../Documents/my1b.dsk</image>
Then boot up. The first disk will boot. To change disks on the fly, swipe down to get the menu. In the upper right corner you’ll notice a floppy icon rotating on its Y-axis. Tap it and the next disk will be inserted. Keep taping to cycle through all your disks. Each tap action will summon a pop-up message with the name of the disk. Easy.
Update: March 15 2011, iOS 4.3 and iPad 2
No worries, iOS 4.3 on iPad I and 2 tested.
Update: April 6 2011, ActiveGS 1.22
ActiveGS 1.22 tested.
Update: April 11 2011, More config file tips and 1.22 corrections
For 144K Apple II disk images use slot 6 with an Apple2 format, e.g.:
    <format>APPLE2</format>
    <image slot="6" disk="1">../Documents/appleii.dsk</image>
    <bootslot>6</bootslot>
For 800K Apple IIgs disk images use slot 5 with a 2GS format, e.g.:
    <format>2GS</format>
    <image slot="5" disk="1">../Documents/SYSTEM6.2MG</image>
    <bootslot>5</bootslot>
For Apple IIgs HD images use slot 7 with a 2GS format, e.g.:
    <format>2GS</format>
    <image slot="7" disk="1">../Documents/c.2mg</image>
    <bootslot>7</bootslot>
Custom color config example:
<bramparam>background:black;border:dark-gray;font:green</bramparam>

Thanks to Rich and John (see comments) for the tips.
Update: August 22 2011, More RAM
If you need more RAM (in MB), then add this to your config (e.g. 8 for 8 MB):
<emulatorParam>_memorySize:8</emulatorParam>

Update: September 21 2011, DiskAid
Many Windows users are having problems with iExplorer and have reported that DiskAid is a good alternative.
Update: October 15 2011, iOS5
Mike has confirmed that iOS 5 is safe for ActiveGS and iExplorer. Apple II Forever!
Update: October 16 2011, iExplorer
Changed iPhone Explorer to iExplorer in document.
Update: November 26 2012, iOS6
This hack does not work with iOS6. The app directory is locked down. Jailbreaking is your only hope.

 It was the week of October 31th 2010 and I found myself working in NJ. Fortunately, I was only a short train ride away from Manhattan where my kid lives as a student at NYU.
 Well, there it is, nestled between my keyboard, trackpad, Superdrive and my 27″ Cinema Display stand.
 The second problem was (and is) that I needed a spinner for certain retro games. This problem is still unsolved. As good looking and capable as the PowerMate is, it’s no spinner. The PowerMate can be configured to perform just about any action, e.g. mouse right, scroll down, keyboard left, etc… and it can be configured on a global and per application basis. Since most retro emulators will use the mouse or keyboard arrow keys as a spinner/paddle surrogate, then this should be easy.